
FLIGHT FOR KIDS
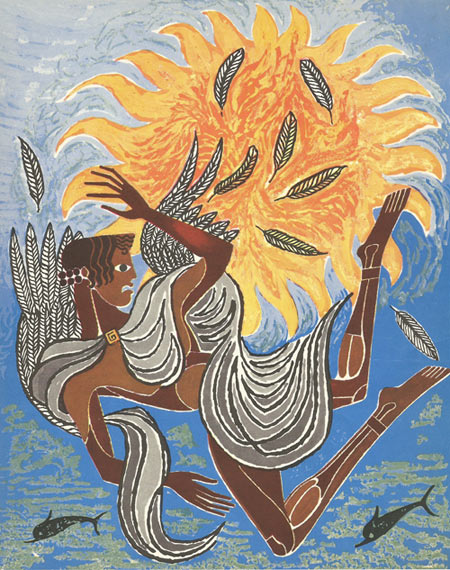
Figure 1. Myth of Icarus and Daedalus.
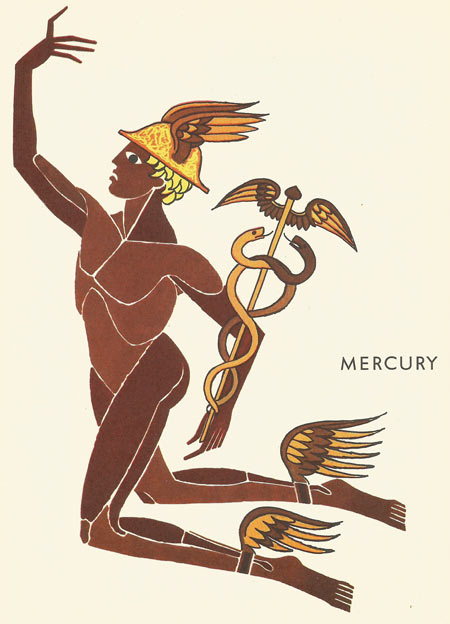
Figure 2. The Roman god Mercury.
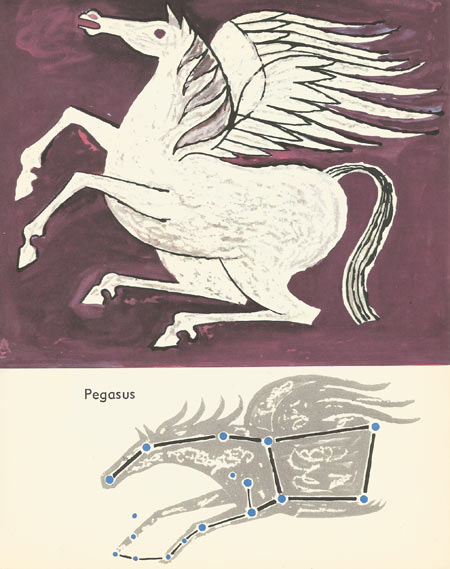
Figure 3. Myth of Pegasus.
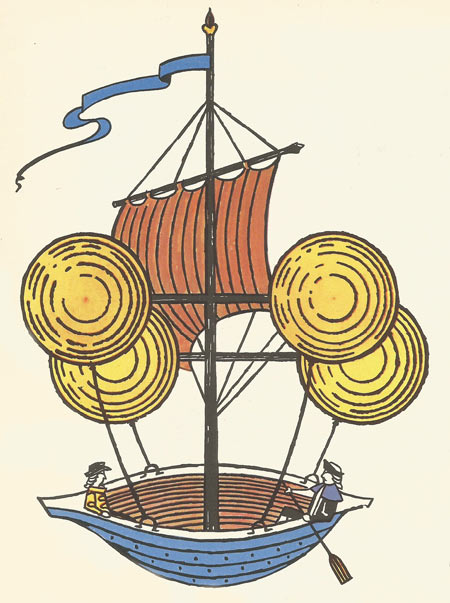
Figure 4. Flying machine designed by Francesco de Land.
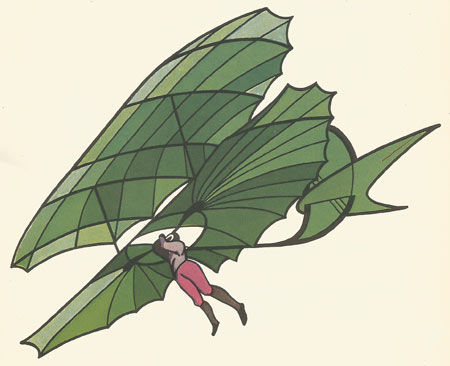
Figure 5. Otto Lilienthal.
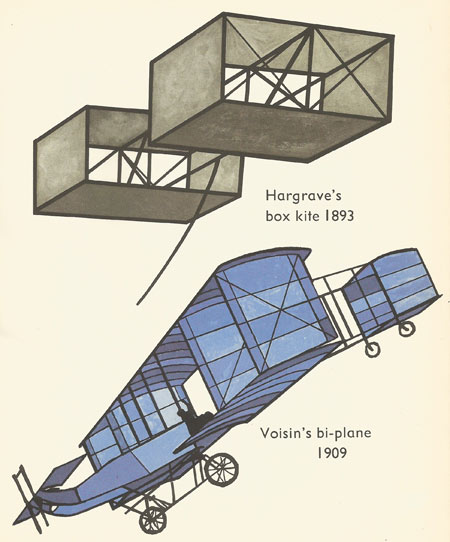
Figure 6. Hargrave's box kite (1893) and Voisin's biplane (1909).
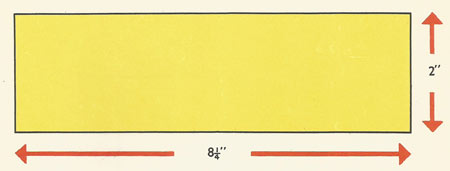
Figure 7. Paper for box kite.

Figure 8. Wood for box kite.
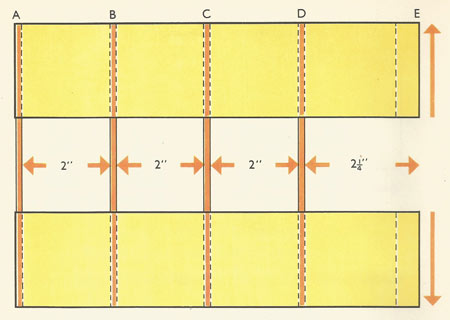
Figure 9. Plan for box kite.
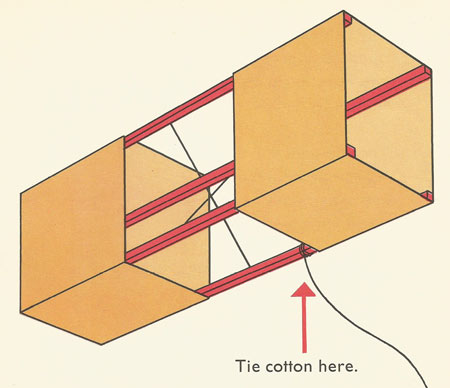
Figure 10. Complete box kite.
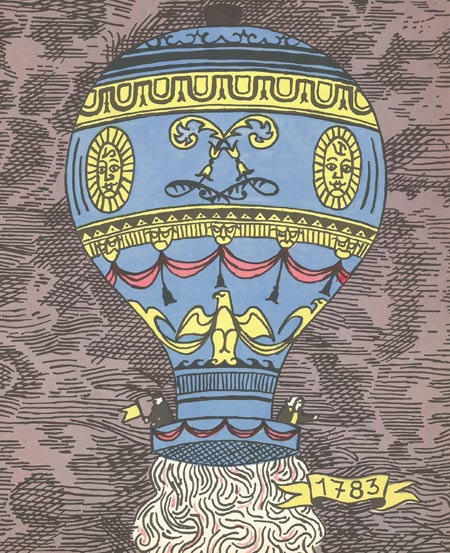
Figure 11. Montgolfier balloon.
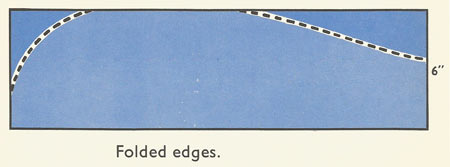
Figure 12. Model hot air balloon construction 1.
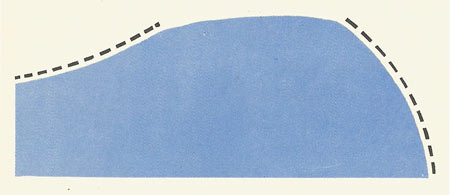
Figure 13. Model hot air balloon construction 2.
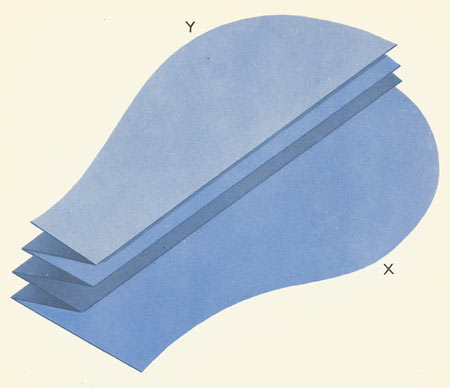
Figure 14. Model hot air balloon construction 3.
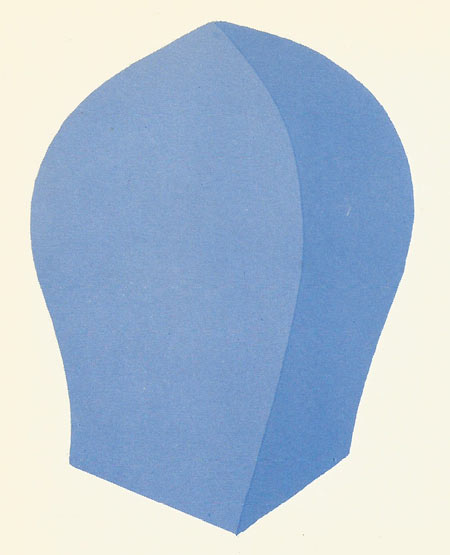
Figure 15. Model hot air balloon construction 4.
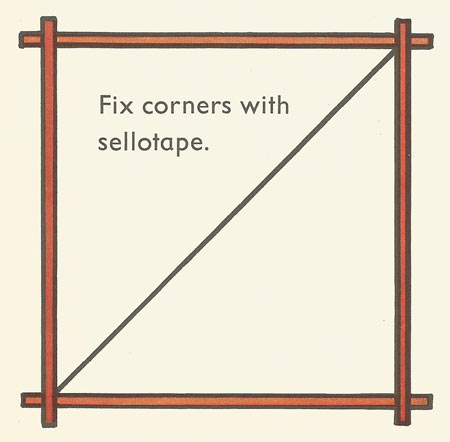
Figure 16. Model hot air balloon construction 5.
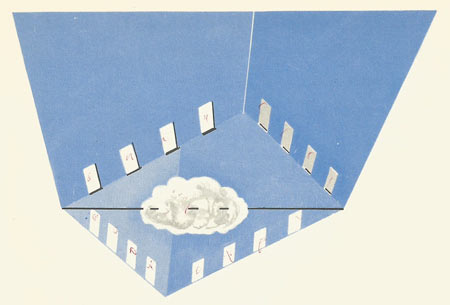
Figure 17. Model hot air balloon construction 6.
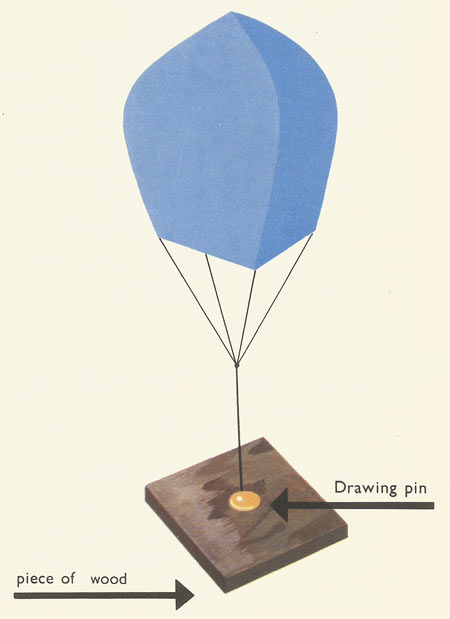
Figure 18. Hot air balloon experiment.
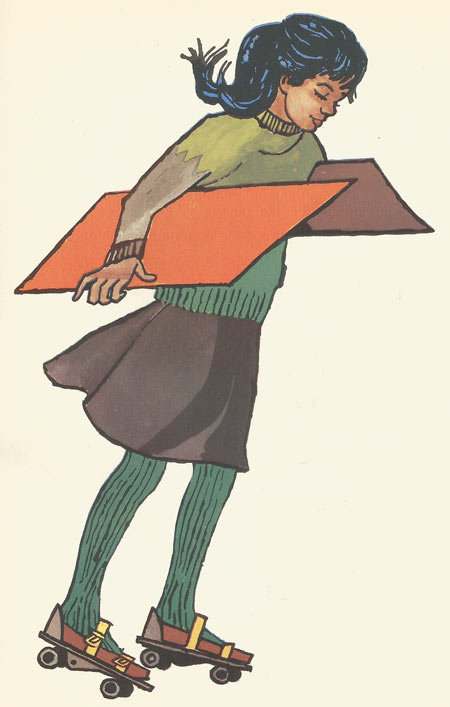
Figure 19. Fly like a bird experiment.
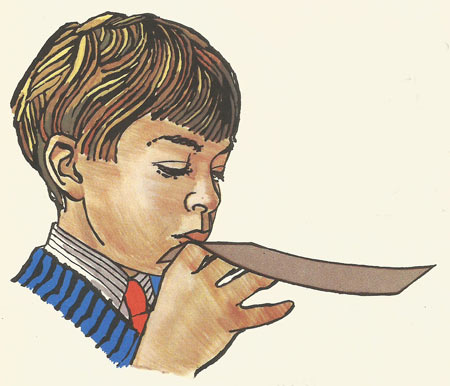
Figure 20. Blowing over paper.
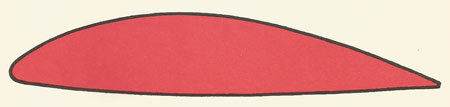
Figure 21. Wing section.
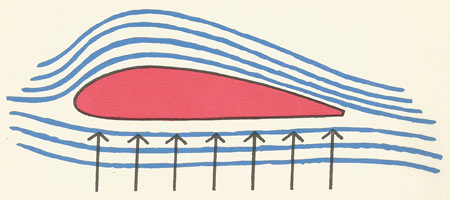
Figure 22. Air flow around a wing.
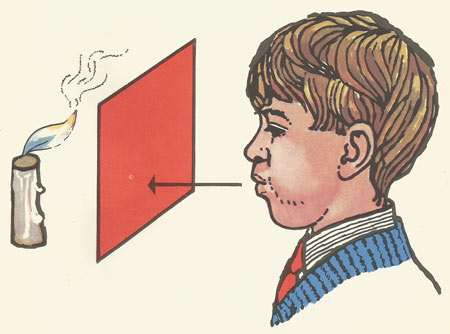
Figure 23. Candle and blowing air experiment 1.
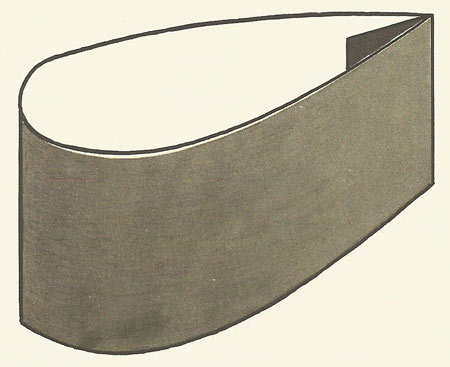
Figure 24. Candle and blowing air experiment 2.
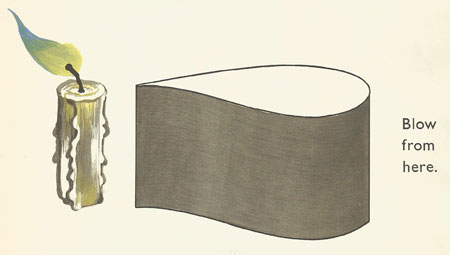
Figure 25. Candle and blowing air experiment 3.

Figure 26. Candle and blowing air experiment 4.

Figure 27. Candle and blowing air experiment 5.
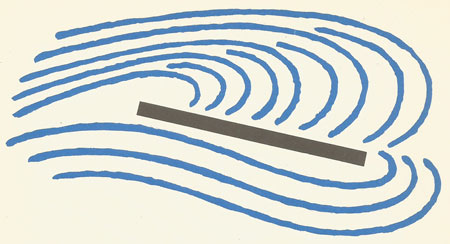
Figure 28. Candle and blowing air experiment 6.
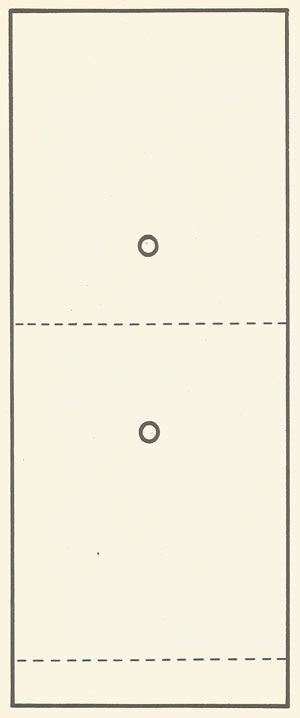
Figure 29. Model wing 1.
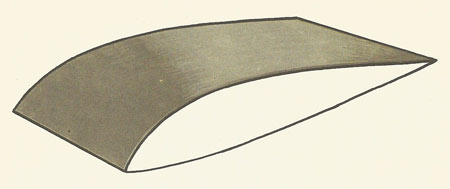
Figure 30. Model wing 2.
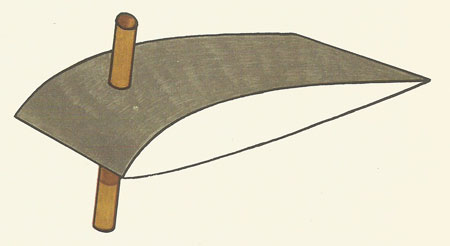
Figure 31. Model wing 3.
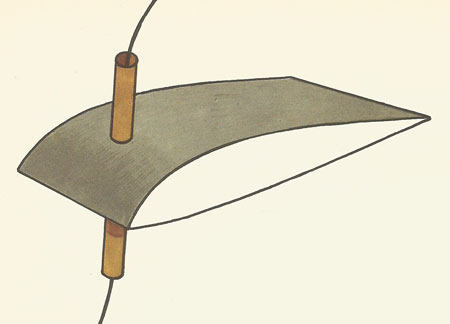
Figure 32. Model wing 4.
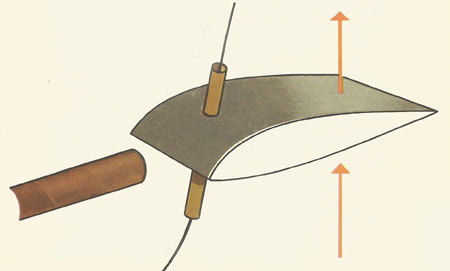
Figure 33. Model wing 5.
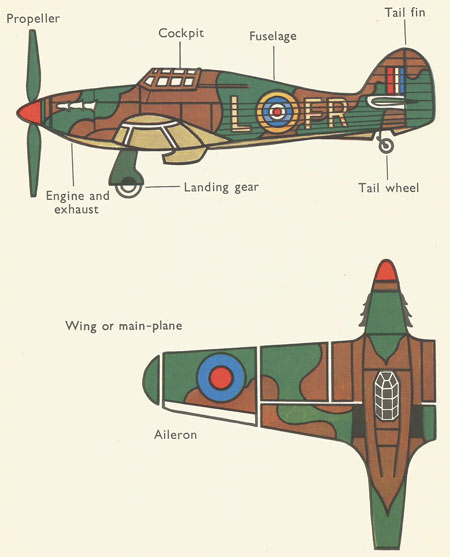
Figure 34. Parts of an airplane 1.
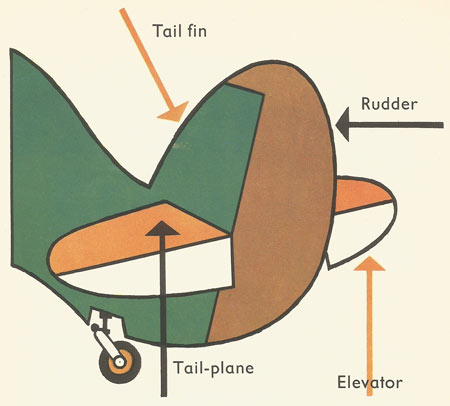
Figure 35. Parts of an airplane 2.
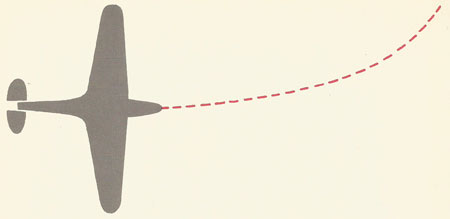
Figure 36. Rudder left.
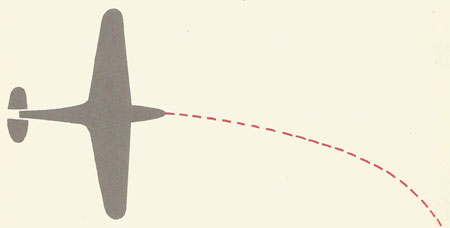
Figure 37. Rudder right.
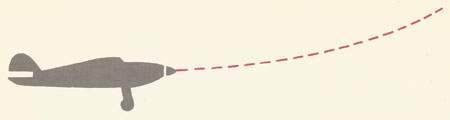
Figure 38. Elevators up.
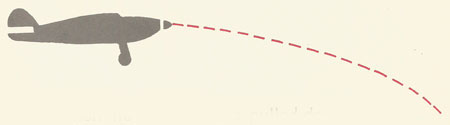
Figure 39. Elevators down.
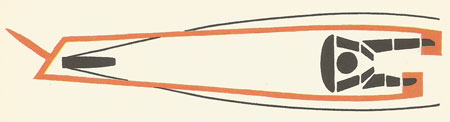
Figure 40. Rudder control left.
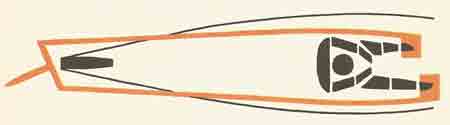
Figure 41. Rudder control right.
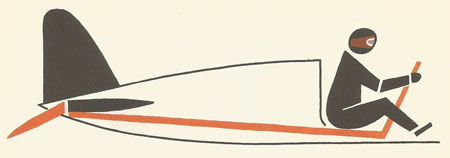
Figure 42. Joystick forward.
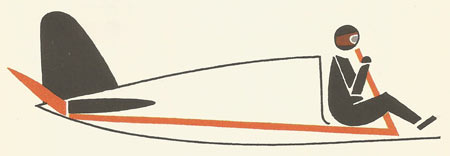
Figure 43. Joystick backward.
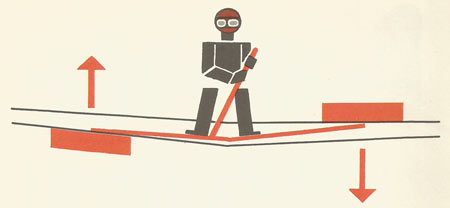
Figure 44. Joystick left.
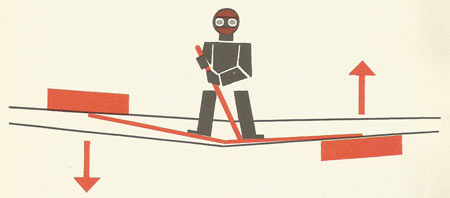
Figure 45. Joystick right.
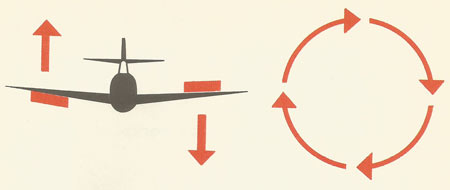
Figure 46. Ailerons.
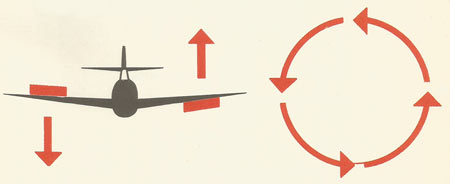
Figure 47. Ailerons.

Figure 48. Airplane model to make.

Figure 49. Balsa wood for model airplane.
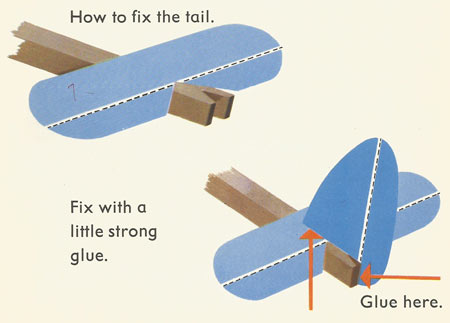
Figure 50. Model plane tail.
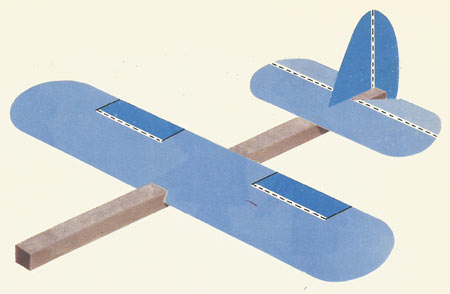
Figure 51. Model plane.
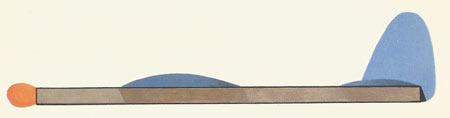
Figure 52. Model plane with tape on nose.

Figure 53. How to hold the model plane.

Figure 54. Flying wing.
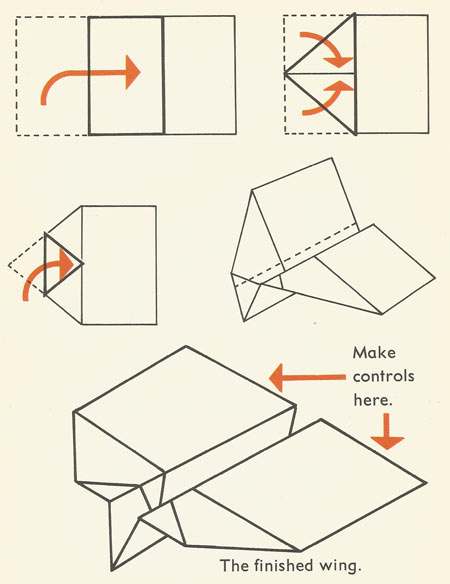
Figure 55. How to make a flying wing.
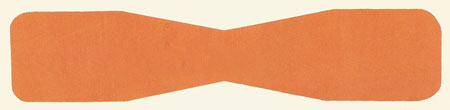
Figure 56. Propeller template.
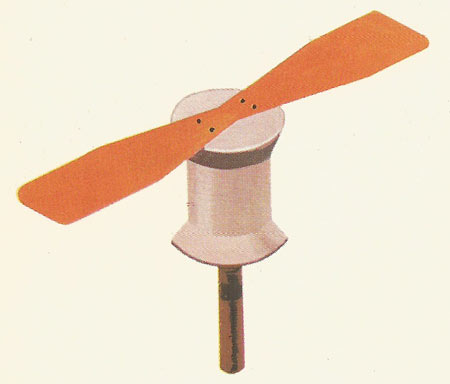
Figure 57. Propeller, reel, and pencil.
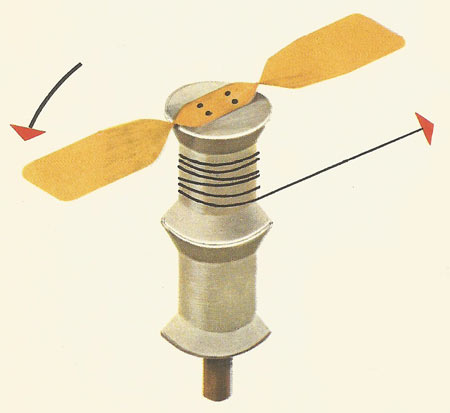
Figure 58. Finished model propeller.
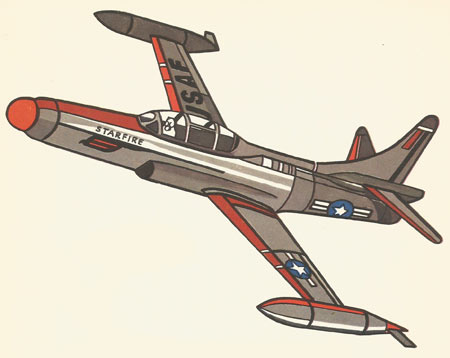
Figure 59. Jet plane.
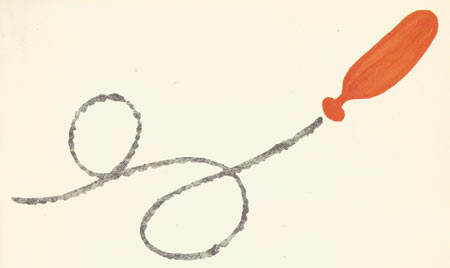
Figure 60. Balloon rocket.
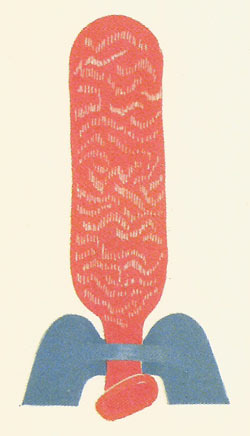
Figure 61. Balloon rocket with fins.
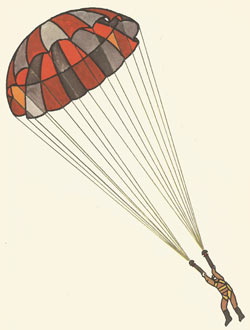
Figure 62. Parachute.
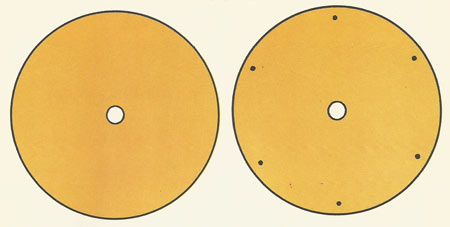
Figure 63. Parachute model 1.
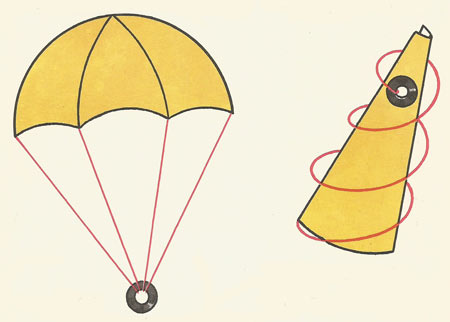
Figure 64. Parachute model 2.
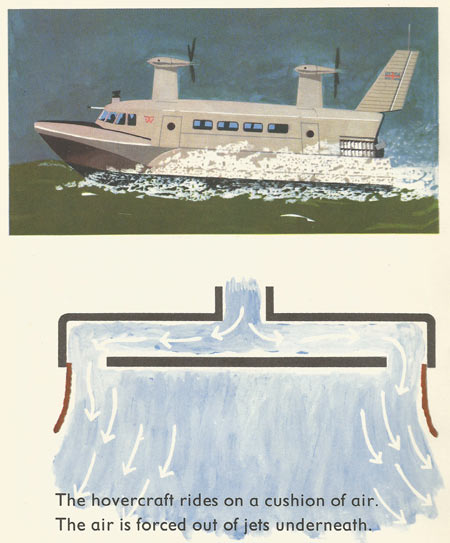
Figure 65. Hovercraft.
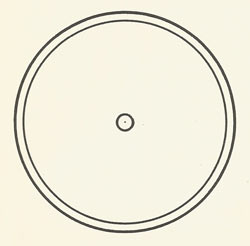
Figure 66. Model hovercraft 1.

Figure 67. Model hovercraft 2.
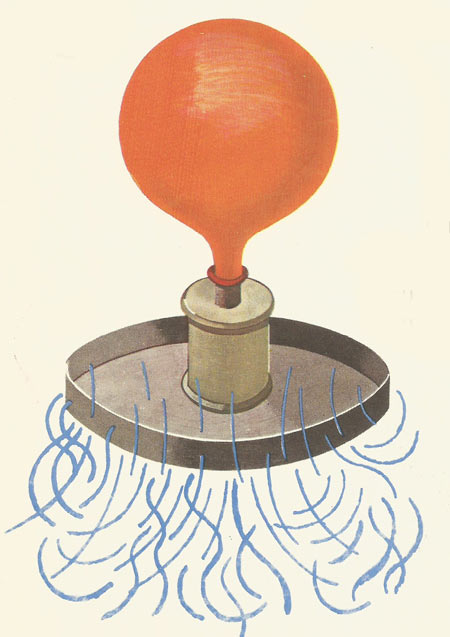
Figure 68. Model hovercraft 3.
Mythical flights
In Greek myth, there is a story about a boy called Icarus and his father who were put into prison. Icarus' father made some wings out of feathers and wax. Then the two of them fixed the wings to their backs and flew out of prison (Figure 1).
Icarus flew too near the Sun and the wax in his wings melted. He fell into the sea and was killed. His father flew to the island of Sicily.
Mercury was a Roman god who had winged feet (Figure 2). He used his winged feet to do the many jobs given to him by other gods. On his head he wore a winged cap, which also helped him to fly. Mercury had a magic wand with wings at the top and two snakes twisted around it. With the magic wand Mercury could turn things into gold. Doctors and nurses have this winged wand and the two snakes as a badge.
Pegasus was a winged horse of the Greek gods (Figure 3). He was used by the gods to help them to win their battles. Pegasus flew to the top of a mountain called Helicon and stamped his hoof on it to stop the mountain growing. After a time Pegasus became very proud and flew into the sky. The gods were angry and they turned Pegasus into a group of stars, which you can see well in the northern sky in October and November.
Early attempts at flight
People used to watch birds and wish they could fly too. Lots of ideas were tried but they usually ended in failure (Figure 4). People risked their lives trying to fly. They made flying machines. One of the first things made to flight was a kite Figure 5).
The kite
In 1893 a man named Otto Lawrence Hargrave invented a box kite. With this he was lifted off the ground about one hundred feet. This experiment was tried in Australia.
As a result of his experiment others became interested in being able to fly and copied his box kite. Then they invented biplanes, which looked like box kites Figure 6).
Make this box kite
This box kite is easy to make and will fly very well indeed. You will need some thin balsa wood and thin pieces of garden cane. If you use garden cane it must be sliced thinner than a match-stick. The covering of the box kite is tissue paper. The line for flying the kite is a reel of cotton. This model box kite will fly to a height of about 100 feet.
Cut two pieces of tissue paper this size (Figure 7).
Cut four pieces of balsa wood or garden cane this length (Figure 8).
This wood is glued to the paper using a strong glue.
Mark each piece of tissue paper for 2 inch spaces. The last space will be 2¼ inches. Look at the picture. Glue along line A and carefully fix one piece of balsa wood or cane. Next fix B, C, D. To finish the kite glue piece E to the back of A (Figure 9).
To keep the box kite in shape fix two pieces of balsa wood or garden cane across the middle. Fix them with some glue. The kite is now ready to fly Figure 10).
Balloons
The flying machine shown here was made by two Frenchmen called Montgolfier (Figure 11). They thought that it was the smoke from the fire underneath which made it rise into the air. But, in fact, it is the air rising when heated that causes the flying machine to lift.
Model hot air balloon
Fold four large sheets of tissue paper and mark out the shape shown (Figure 12).
Use thick white paste to fix the tissue paper together. Put paste along the dotted edge. Make the edge about half an inch wide (Figure 13).
Put another piece of tissue on top of this (Figure 14).
Fix the pieces of tissue paper like this. To finish it off past the edge X and bring the edge Y over and stick it down. When opened out it will look like this (Figure 15).
Make sure there are no holes in the edges. Now make a square frame for the bottom of the balloon. Cut four lengths of garden cane. Each piece must be thinner than a match-stick. Fix the corners with sellotape. Put a piece of very thin wire across the square (Figure 16).
Fix the frame to the tissue paper with small pieces of sellotape.
Fix a pad of cotton wool the size of a match box to the middle of the wire. Put methylated spirit on the cotton wool (Figure 17).
Hold the edges of the balloon. Get one of your friends to light the cotton wool pad. The balloon will begin to lift after a few seconds.
Hot air balloon experiment
Sometimes it is too windy to fly the hot air balloon outside. Here is an experiment for you to try in the classroom. Tie four equal lengths of cotton to the corners of the balloon (Figure 18).
When you have fixed up the balloon experiment carefully light the cotton wool pad. With the right amount of methylated spirit the balloon will fly for about 3 minutes.
Cut some very small pieces of thin wire and put little pieces onto the cotton wool beneath the balloon. See how much the balloon will lift before it begins to fall.
How birds fly
As a bird moves its wings up and down it lifts itself into the air. There is a difference in the way birds use their wings to fly. Look at small birds flying. How often do they beat their wings? Look at large birds flying. How often do they beat their wings? Which birds beat their wings the fastest?
Try this experiment. It will show you how the wings of a bird help it to fly. Put on a pair of roller-skates. Get two large sheets of cardboard and hold them as shown. Beat your wings and try to move along. Feel the air pressure on your wings (Figure 19).
How airplanes fly
An airplane has fixed wings. It is air pressure under the wings which lifts the plane into the air. Here is a simple experiment.
Cut a piece of paper. Hold the paper under your lip. Blow hard over the paper. What happens? (Figure 20)
As you blow over a piece of paper you will see that it lifts up. Air moving over the wing of an airplane makes the wing lift upwards.
The wings of an airplane
The wings of an airplane have a specific shape. From the side, a wing has this shape (Figure 21).
This shape is very important. It is this special shape that gives the wings the power to lift an airplane off the ground. This is what happens (Figure 22).
The experiment you did with roller skates and cardboard wings showed you that air pressed against your wings. You felt the air pressure. When air was blown over the piece of paper it was lifted up. When air passes over a wing the air pressure underneath is stronger. The wing lifts upwards.
Two experiments to try
These two experiments will show you why the wings of an airplane have the shape called a wing section. Put a lighted candle behind a piece of card and blow. What happens to the flame of the candle? (Figure 23)
Cut a piece of paper and make it into this shape. Stick the edges with paste (Figure 24).
Blow from the side shown. What happens to the candle flame? (Figue 25)
This is the way the air moves at the back of the card (Figure 26).
This is the way the air moves round the shaped piece of paper (Figure 27).
This is what would happen to air moving over a straight wing (Figure 28).
When air does this it slows things down. A scientist will say that the air is dragging. When the correct shape is used the air does not drag. The scientist will say that it is streamlined.
Make this model wing. Copy or trace this shape. Cut it of strong white paper. Carefully crease the dotted line, Make two holes the size of a milk straw (Figure 29).
Put some paste on the end section and fix together like this (Figure 30).
Cut a small piece of milk straw and push it through the two holes. Use a little strong paste to fix it firm (Figure 31).
Thread a piece of thin cotton through a milk straw (Figure 32).
Ask one of your friends to hold the ends of the cotton. Blow across the model wing by using a cardboard tube. The wing will lift along the cotton (Figure 33).
Parts of an airplane
How an airplane works
The funny thing about an airplane is that it appears to move about in the air without any help. We can see a car turn in the street and we can see the front wheels helping it to turn. How does an airplane turn in the sky?
At the back of the plane is a tail fin and a rudder. You will also see the tail-planes and the elevators (Figures 34 and 35).
When the rudder is turned to the left this is the way the airplane will turn (Figure 36). When the rudder is turned to the right this is the way the airplane will turn (Figure 37).
When the elevators are turned up this is the way the airplane will move (Figure 38).
When the elevators are pulled down this is the way the airplane will move (Figure 39).
In simple airplanes the rudder may be turned using the feet. When the left foot pushes on the rudder control the airplane turns to the left (Figure 40).
When the rudder control is pushed with the right foot the airplane turns to the right (Figure 41).
The elevators are moved up and down by using something called a joystick. The joystick is held in the hands. When the joystick is pushed forward the airplane begins to dive (Figure 42).
When the joystick is pulled backward the airplane begins to climb (Figure 43).
When the joystick is pushed to the left the left wing is pushed down (Figure 44).
When the joystick is pushed to the right the right wing is pushed down (Figure 45).
On the wings you will see two controls called ailerons. These controls make the whole airplane twist through the air. The ailerons are worked by using the joystick (Figure 46 and 47).
An easy model to make
Make this model airplane (Figure 48). You can make it fly just like a real one. You will need some stiff white drawing paper for the wings, tail fin, and tail-planes. For the body or fuselage you will need some balsa wood ¼ inch square. Make these pieces.
Carefully trace the wings, tail-plane, and tail fin and cut them from stiff white paper. Carefully make creases along the dotted lines. You will see these are easily made on the rudders and elevators. Before the creases can be made on the wings you must cut along the lines to the dotted line for the ailerons.
Now cut a 3½ inch length of balsa wood. Fix these pieces together with a spot of strong glue (Figure 49).
With a sharp knife make a slanting cut 1¼ inches from one end. Make another slanting cut the other way as shown. At the end marked 'A' make a small slit Figure 50).
Fix the wing into the small cuts. Make sure that the wing is in the middle (Figure 51).
How to fly the model
Fix a small strip of sticky tape to the end of the body. When you have the right amount fixed, your airplane will fly straight (Figure 52).
How to hold the model (Figure 53).
When you have made your air lane fly properly try to use the controls on it. First make your model turn to the right and to the left by using the rudder. Keep the other controls straight.
Make a flying wing
See Figure 54.
You will need a piece of paper 9 inches long and 6 inches wide. If you fold the paper as shown below your flying wing will fly very well. Make two controls at the back of the wing. Experiment with these (Figure 55).
The propeller
An airplane moves through the air using a propeller. A propeller acts like a screw. When a screw is turned with a screwdriver it moves into wood. When an engine turns the propeller it screws its way into the air.
The propeller is very powerful and as it is turned it makes the whole airplane move forward and into the air. The wings are pulled through the air. It is the air pressure on the wings that makes the airplane take off.
Make this propeller
See Figure 56.
Use small tacks to fix the propeller to a cotton reel. Fix a length of pencil in the cotton reel (Figure 57).
Make a little twist in the prop leer blades. Put the pencil into another cotton reel. Hold this in the hand. Wind string round the cotton reel and pull. See how it flies (Figure 58).
A jet plane
See Figure 59.
A jet plane does not use a propeller. Air and gases are compressed and forced out of special jet tubes. The pressure is very great and the jet plane moves at a high speed through the air.
A little experiment
Blow up a long balloon and let it go into the air. This is what happens (Figure 60).
The air rushing out of the balloon pushes it along like a jet plane.
Try this. Cut a small piece of cardboard and push the end of the balloon through it. Put little weights on the cardboard. See how much the jet balloon will lift (Figure 61).
Parachutes
If anything happens to an airplane while it is flying the pilot can escape by using a parachute. The parachute is a large circular section of silk or nylon. Several strong cords are fixed to this and these are fixed to a special harness. The pilot fixes the harness to himself.
Make a parachute
Cut a large circle of tissue paper. Cut a small hole in the middle. Fix six pieces of cotton to the parachute (Figure 63).
Fix a small washer to the strings. Fold like this to fly the parachute (Figure 64).
The Hovercraft
See Figure 65.
Make a model hovercraft
You will need a large tin lid, at least 5 inches across. Make a very small hole in the middle. Use a hammer and nail. Make the hole from the top of the lid Figure 66).
Make a tube out of sticky brown paper. Roll the paper round pencil. Fix one end of the tube into a cotton reel (Figure 67).
Put sticky tape on one end. Make it thick enough to fix on a balloon. Use strong glue to fix this over the hole in the tin lid.
On a smooth table top your hovercraft will ride on a cushion of air (Figure 68).