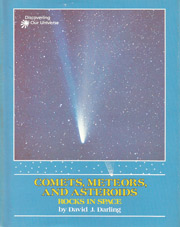
COMETS, METEORS, AND ASTEROIDS: activities
Drawing an ellipse.
1. Spot a meteor
You can see meteors, or shooting stars, on any clear night of the year. It's best to look for them when you are well away from bright city lights. Simply stare upwards for a few minutes, and you should see the thin white trail of a meteor flash across the sky. If you're patient, you may see as many as 10 meteors an hour.
On certain nights of the year, there are meteor showers. Each one is named after the constellation of stars from which it seems to come.
Try to spot the meteor showers listed below. To get help in locating them, visit a planetarium or refer to a book on the sky at night.
| Shower | Dates | Best night |
| Quadrantids | Jan.1 - Jan. 6 | Jan. 3 |
| Perseids | Jul. 25 - Aug. 18 | Aug. 12 |
| Orionids | Oct. 16 - Oct. 26 | Oct. 21 |
| Taurids | Oct. 20 - Nov. 25 | Nov. 4 |
| Geminids | Dec. 7- Dec. 15 | Dec. 14 |
2. Draw the path of a comet
Comets move in very long, stretched out orbits around the Sun. The shape of the paths is an oval, or ELLIPSE.
To draw an ellipse, begin by taping a big sheet of drawing paper onto a flat wooden board. Press two thumbtacks, three inches apart, halfway into the board and paper. Cut a piece of strong thread about a foot long and together its ends.
Next, loop the thread around the pins and stretch it tight with a pencil. Keep the pencil upright and the thread tight, and move the pencil around the whole loop. The shape you'll have drawn is an ellipse.
Try changing the distance between the pins. Try smaller distances – one or two inches – and larger distances – four or five inches. What do you notice? Which look more like the almost circular paths of planets? Which look more like the long, narrow paths of comets?
3. Make craters
Investigate how craters form. Spread newspaper on the floor. Put about 3 inches of flour in a shallow box, such as a shoebox. Sprinkle chocolate cake mix or paint powder on top of the flour using a sieve to get an even layer. Choose several small objects of different size and weight to represent your meteorites. Marbles and pebbles work fine. Drop each object from a height of three feet. After each drop, measure the size of the crater formed, make notes on what the crater and surroundings look like, remove the fallen object, and smooth over the flour. Experiment by dropping the objects from different heights and throwing them in a different angles. Does the angle affect the shape of the crater produced? Investigate features such as crater walls, central peaks, and rays.
For more ideas and variations on this activity, go to this page (University College London) or this page (University of Hawai'i).
Crater glossary
central peak
A mountain found in the center of large craters. It is formed by a rebound of molten rock at the impact site (the marble will be sitting there in this activity).crater
A (usually) circular depression in a surface caused by an impact.ejecta
Material thrown out of the crater.ejecta blanket
Ejecta tossed out at low speed. The material lies like a blanket around the crater.floor
The interior of the crater.rays
Ejecta thrown out of the crater at high speed. The material forms long lines pointing directly away from the crater.rim
The raised edge of the crater. It is formed by the outwards and upwards compression of the crater walls, not ejecta.